Pages

Sunday, May 16, 2010

Creating Realistic Eyes with Polymer Clay Pt. 2


Once your clay has baked and cooled, take some white acrylic paint and thin it down till it is a runny consistency so that you can make transparent washes over the eye.
You want to coat the entire eye but keep some of the color.  You don't want to lose the tint entirely.
Let this dry.  You may have to make three or four washes to get it to the right color.

 Make a dot in the center of your eye with a black sharpie.
Line this dot up with a ruler that has tiny round circle templates.  Ones that you get from a hardware store for bolts and nails is great for making tiny circles.
Use a verithin colored pencil in the color that you are making your eyes, to trace a circle shape that takes up the front side of the eye.
Then trace a smaller one and color it in as round as you can with the black sharpie.

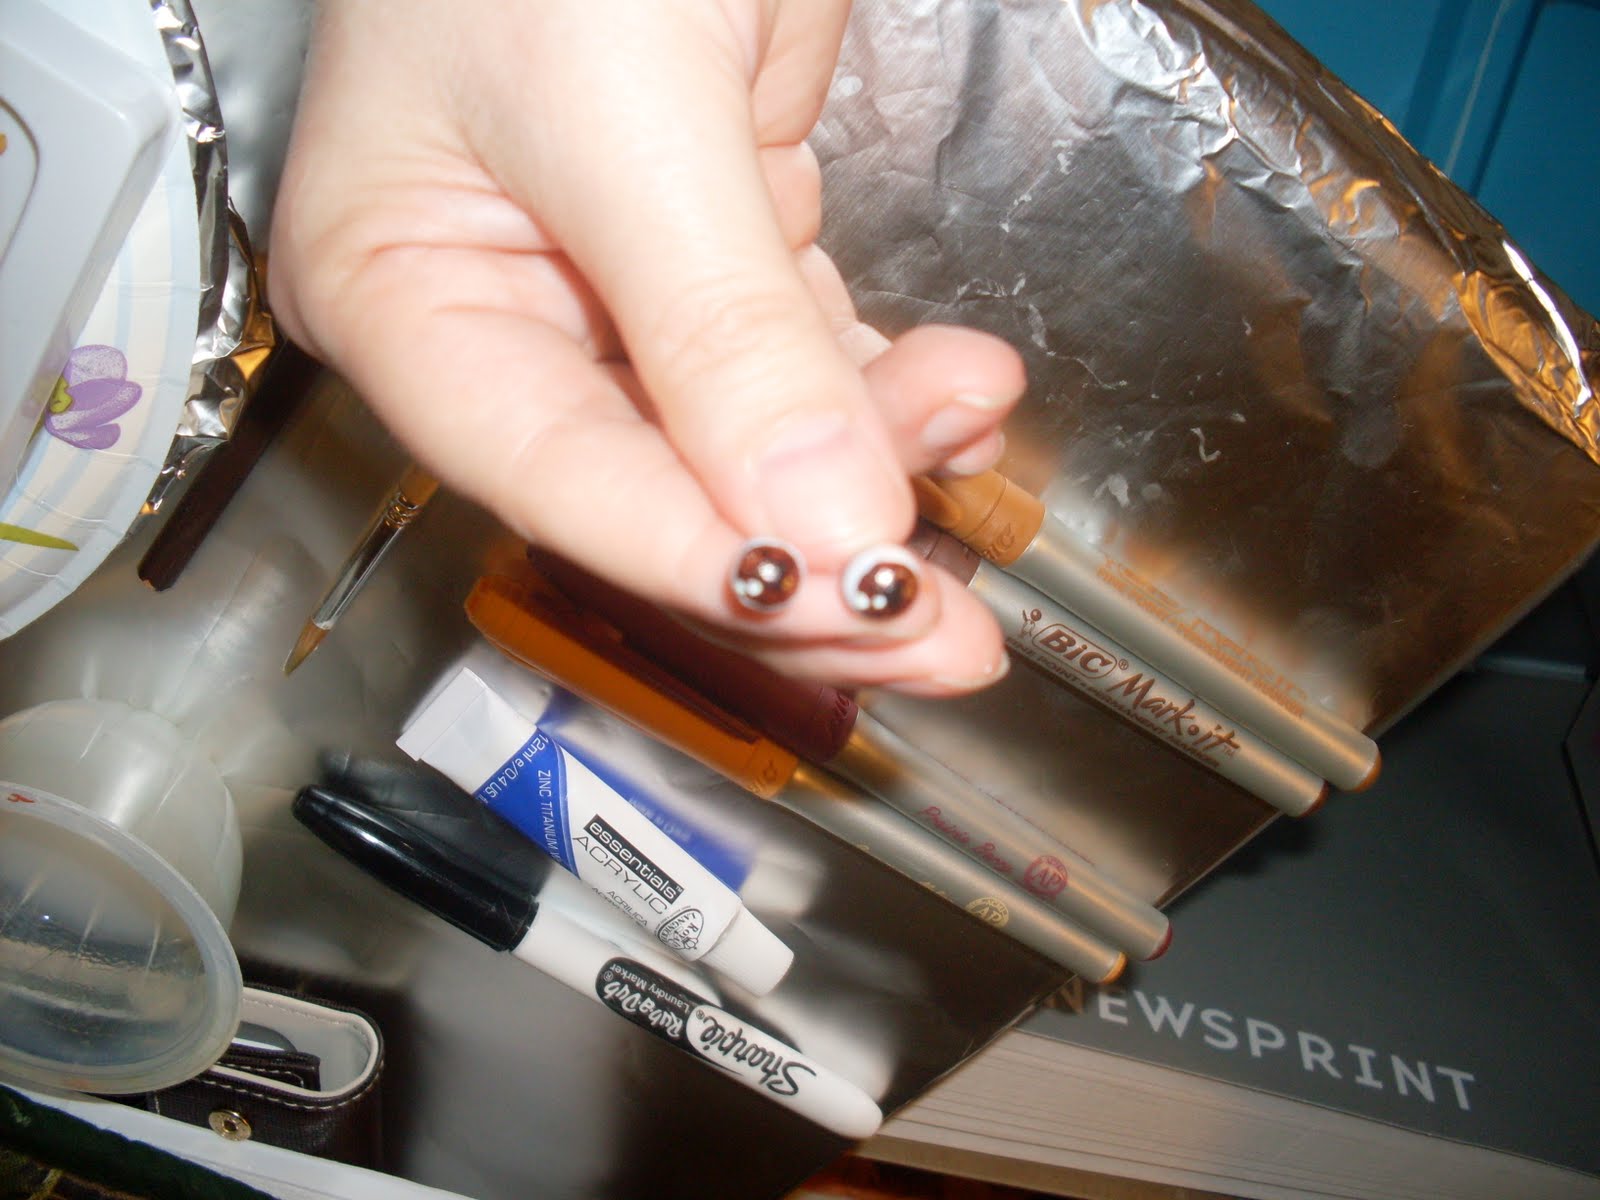
Once the sharpie is dry,  take your light brown Bic Markit and slowly trace in the iris part of the eye.
Then take the dark brown and make a thin dark round line around the pupil and around the ouside of the iris.  Make thin spokes like pie wedges carefully around the iris going inward to to the pupil.

Next take the Magenta Bic Markit and make thin spokes opposite each other in a couple spots.
Do the same thing with the yellow.
Once these are dry,  carefully take white acrylic paint and place dots for highlights near the pupil and outside of the iris.
Let this dry, and paint the entire eye with ceramcoat and let dry.

Cut your wires short and use them to help you place the eyes into your doll clay that hasn't been fired yet. 
When you are placing the eyes, make sure they are the same depth, that the highlights are turned the same way for both eyes, and they are spaced evenly on each side of the nose.

Then continue to build up the rest of your doll face and structure around the eyes.

Creating Realistic Eyes with Polymer Clay Pt1


Tools:

Polymer clay of choice in white
Verithin colored pencil- in color you choose to make your eyes
Round ruler template- like from a hardware store to make tiny circles
Bic Markit pens- light brown, dark brown, dark yellow, magenta
Sharpie Rub a Dub Fine Point Marker
White acrylic paint and fine point brush
wire
Wire cutters
Ceramcoat- clear

Measure out your clay into balls the size you need for your doll.
Try to make them as equal in size as you can.
I normally make more than I need, because you never know when one will jump off the pan and roll
to some inaccessible place like under the fridge.

Once you have your balls created,  cut a thin piece of wire and bend a loop on the end to make them easier to handle.  Pierce the balls carefully in as close to the center as you can and leave the wire in them while they bake.

This is a good time to put on a kettle and make yourself a cup of tea.

I bake my eyes that are approximately 4 mm in size at 275 degrees for five minutes.
I use a convention toaster oven and I hover over them like a hawk. 
I want them to begin to pinken slightly but not burn.
If you look at a person's eyes closely, the whites of the eye are not completely stark white.
They have blood vessels and areas of gray caused by shadow from the eye lids and lashes.

The moment the polyclay eyes begin to tinge a deeper shade, pull them out of the oven fast.
You don't want them to burn or darken too much to where you cannot cover them easily with paint.

Saturday, May 15, 2010

Places you can find my work

Hello everyone,

If you are interested in seeing more of my work, you can order prints of my paintings and
photography here: http://fineartamerica.com/profiles/jenna-mcneal.html

I have a website devoted to my digital animation here:  http://mcneelyart.com/

Friday, May 14, 2010

Beauty around Us- Photography


The flowers are bursting and everywhere you look ,it is a feast for the eyes.
It is an artist's paradise in Spring. This is a photograph I took on a lovely nature walk around my neighborhood. You don't have to go very far away from home, to see amazing things.

Currently accepting Commissions


Hello everyone,


I am currently accepting commissions for portraits in watercolor and colored pencil.

You can view a portfolio of some of my work at mcneelyart.com.

Funky Warm thigh high pattern- work in progress


Hello everyone,


This is another pattern work in progress. I was deeply intrigued by the cloth hose that

used to be a part of period dress. I dislike panty hose but love thigh highs.

I also remember the footed pajama's that I used to wear as a kid and how snuggly warm they were.

So with these things in mind, I used thin sweat pant material to begin designing a pattern

to make a custom fit a pair of warm footed thigh highs. These are going to be awesome in the winter time under night gowns and as an extra layer under regular sweats to lounge around the house in.

I am writing a custom "how to" pattern for these as well. It will show how to measure the foot and leg properly to sew a custom pair of footed thigh highs, in any fabric. They mold to the leg beautifully without any sagging and they don't fall down when you walk. They would be lovely sewn in a soft lace, or great if you wanted to recycle an old sweater and make some really warm snuggly foot and legwear. I am simply thrilled with how these are turning out so far!

Colored Pencil- Self Portrait- Moments of Clarity


This is a small self - portrait that I completed and I am excited because it is going to be on

exhibit in NY in a small arthouse gallery!

Sewing-Custom Slipper/ Shoe Design Pattern


Hello everyone,


This is another work in progress of mine. I am finished with the first shoe and starting on the second one.

This is a custom design of mine and I am currently writing up an e-pattern to teach people how to

measure their own feet to make and design their own custom cloth shoes and slippers.

This is a really fun and relatively easy project once you get the measurements to your liking.

I was trying to make shoes that were slip resistant for around the house which were also comfortable because they were perfectly custom designed for your feet with a full lining.

I hope to have this pattern completed soon.

Doll Head Work in Progress- Polymer Clay


Hello everyone,


This is a doll head work in progess using polymer clay. This is the base, I am making the eyes now and I have to sculpt the rest of the face and features.


I am very unhappy with the tutorials that I have been finding on how to joint doll limbs.


I am attempting to create a fully sculptured doll body in polymer clay, and also have it fully jointed for movement at the shoulders, elbows, wrists, hips, and knees.


I haven't found a method to do this, so I am creating my own style of joint system specifically


for polymer clay so that I can create a statue-like detail in the entire doll, make it able to be dressed and clothed in a variety of ways, and fully poseable.


This is a daunting endeavor, but I am really excited about my journey so far.